


Happy Saturday!
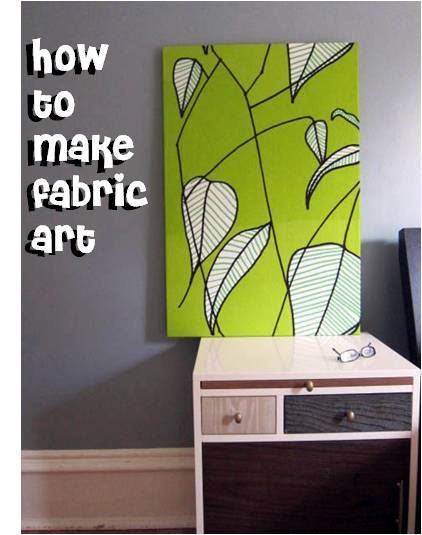
Today I’m going to show you how to make a quick art-piece by framing fabric!
My favorite fabric
I took a trip to Finland in 2008, and I bought a yard of some amazing fabric from Marimekko.
Although I loved the fabric… it gave me anxiety: what should I do with it? What if I sewed something that didn’t fit?
I finally came up with the perfect solution… frame it!
How to Frame Fabric
You’ll need:
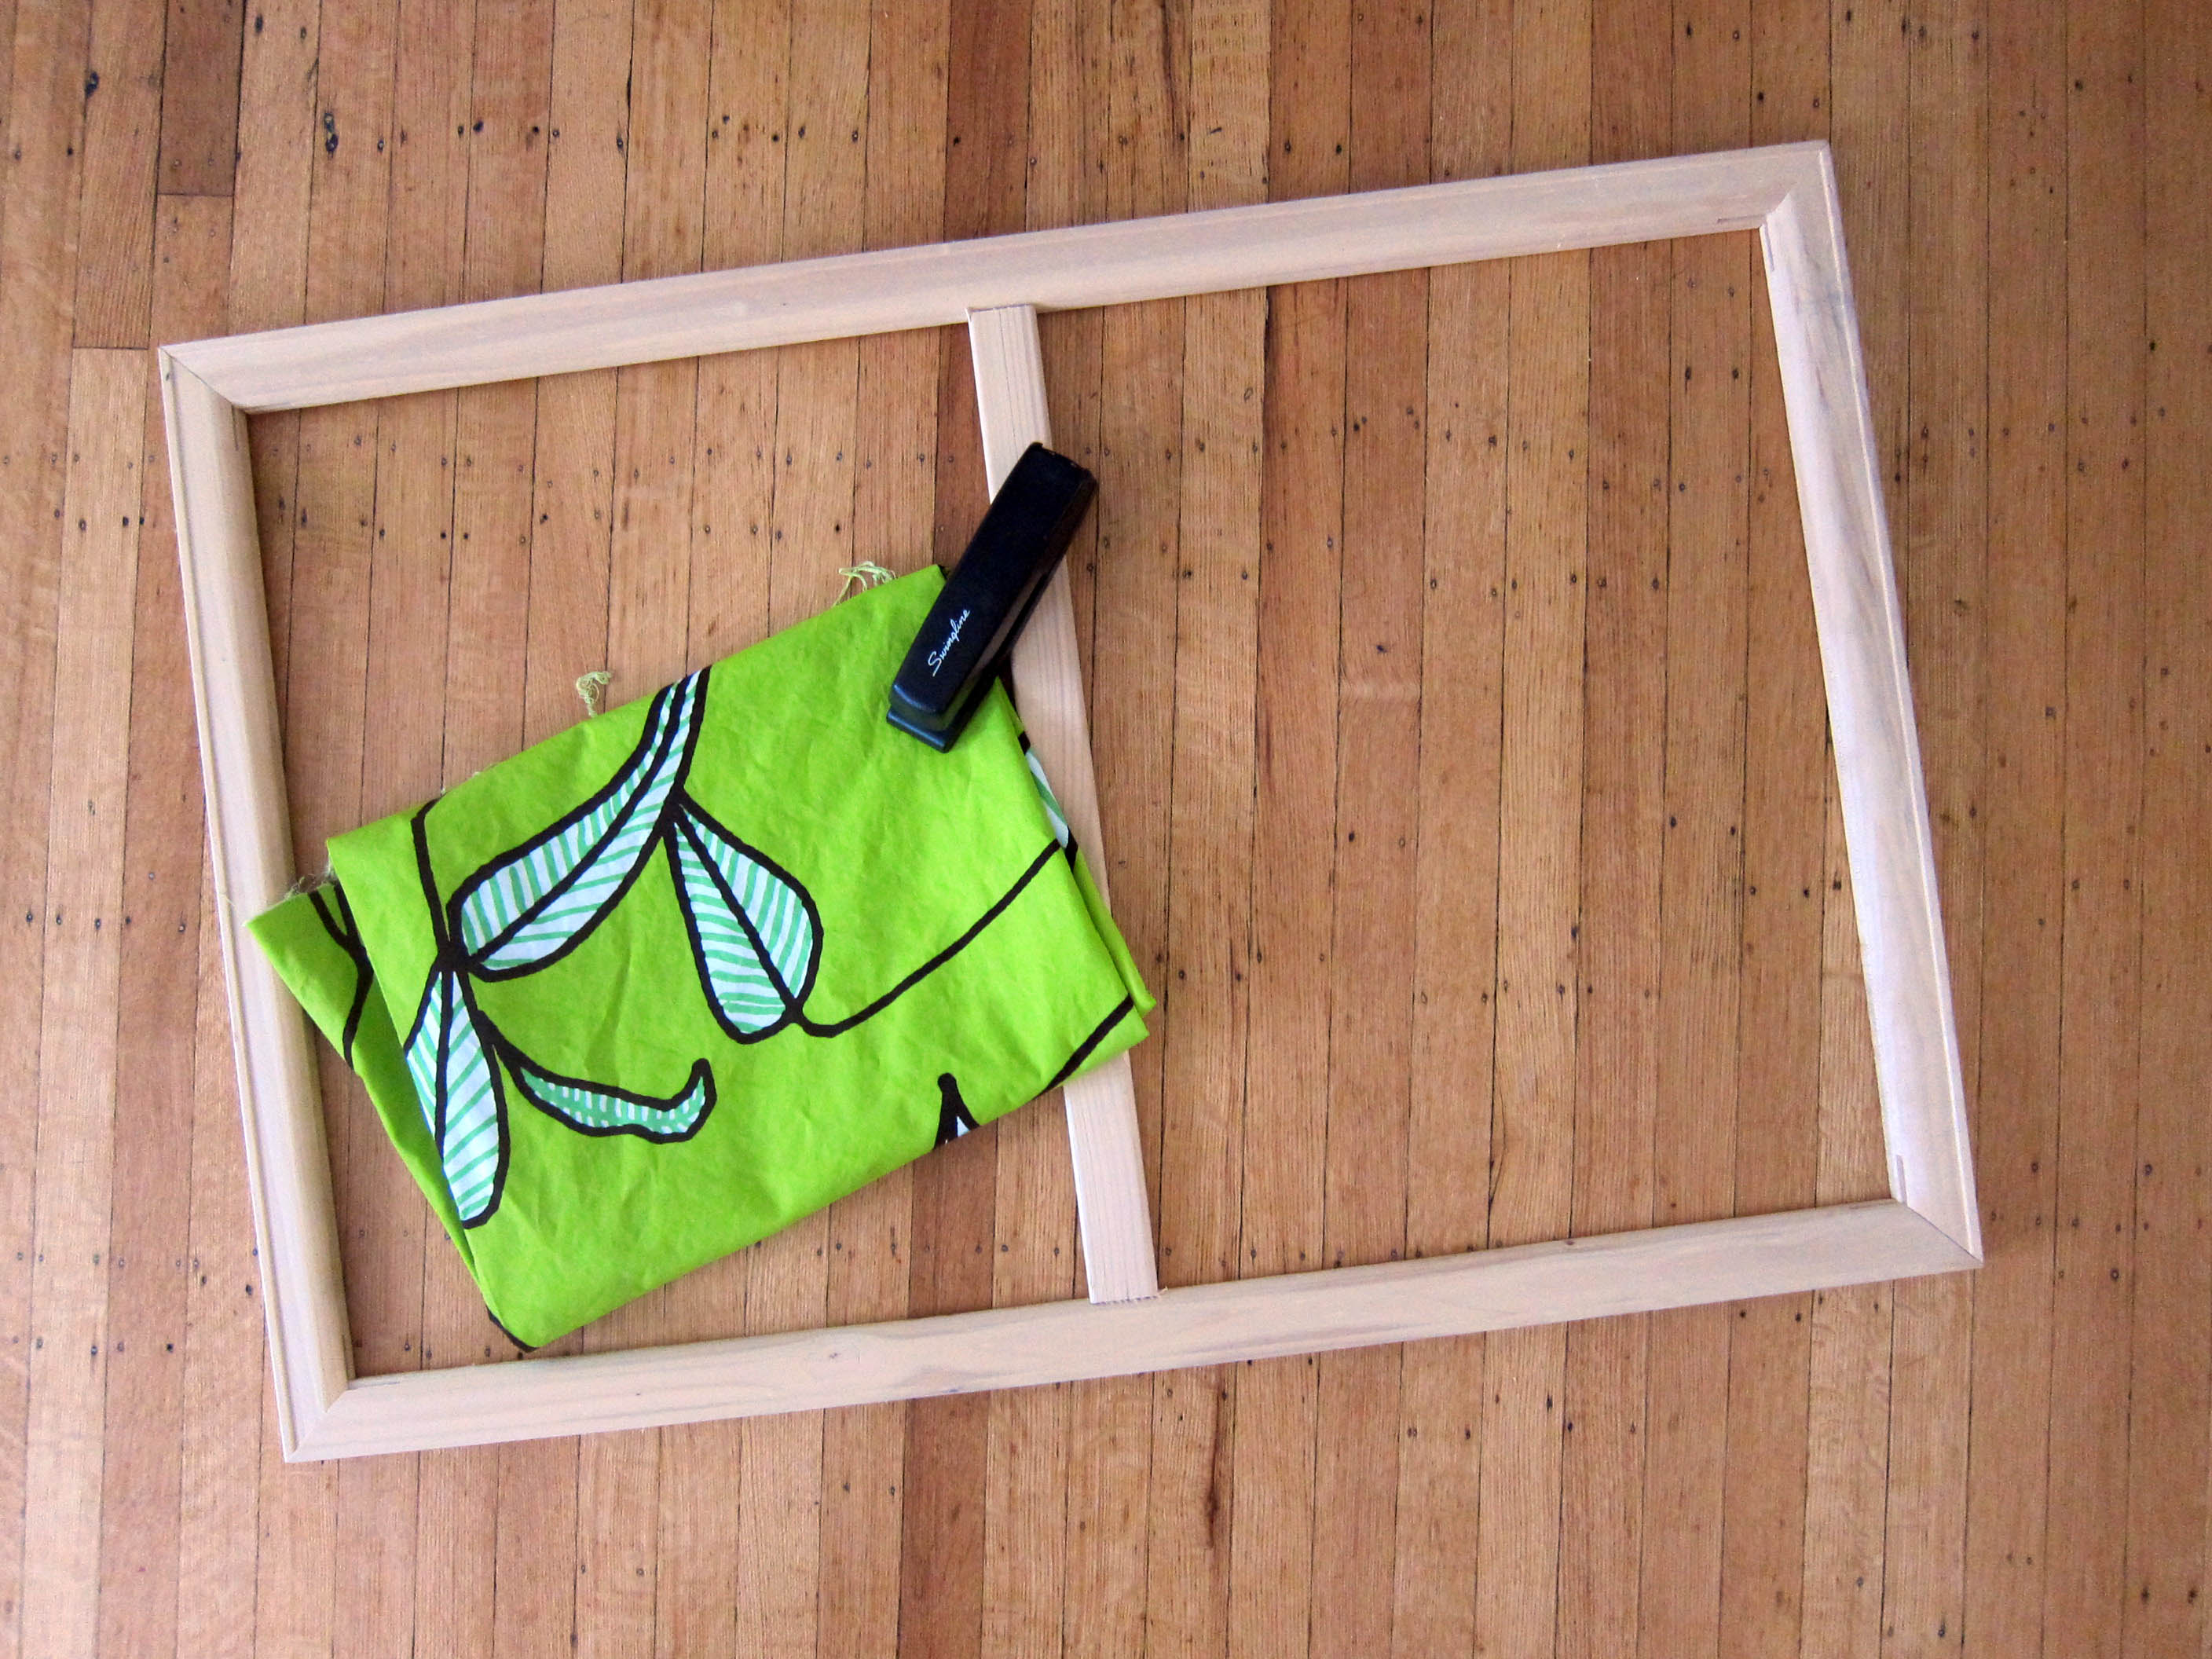
- A frame (a lot of tutorials call for a canvas stretching frame… but I just grabbed an old wooden one from the curb!)
- Enough fabric to cover your frame (plus a few inches on all sides)
- A stapler
Step 1: Wash & iron your fabric
You can skip the ironing if your fabric comes out of the dryer nice and crisp!
Step 2: Place foundation staples
Lay your fabric face down, and place the frame on top.
Now, pull the fabric up and over the sides of the frame and place a staple at the center of each side. Be sure to tug so that the fabric is taut.
Do this for each side.
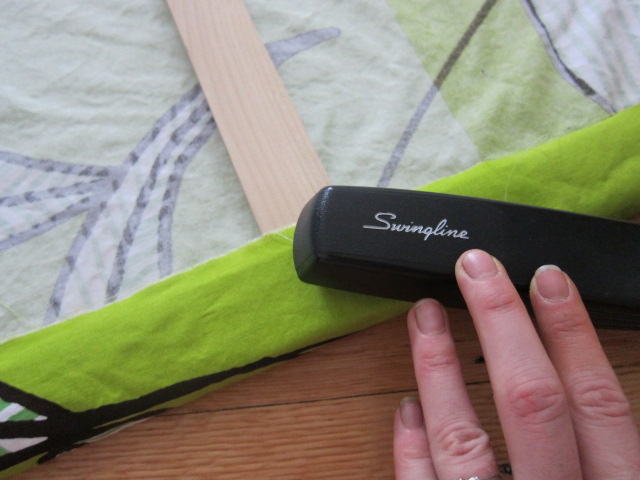
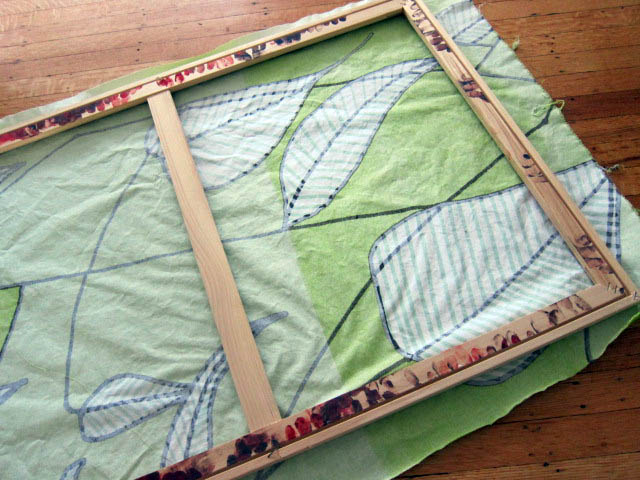
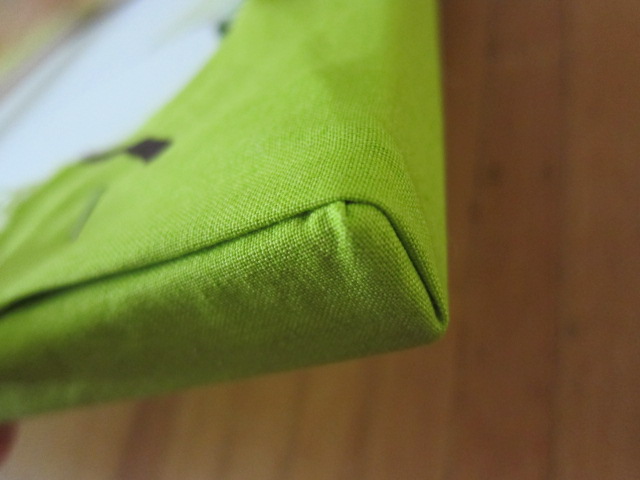
Step 3: Finish Stapling, and do those corners!
Work your way around the frame, placing staples every couple inches or so.
Do the corners last, and when you get to them, take a little time to tuck the corners and staple them neatly.
Step 4: Enjoy!
That’s it! You now have beautiful fabric art!
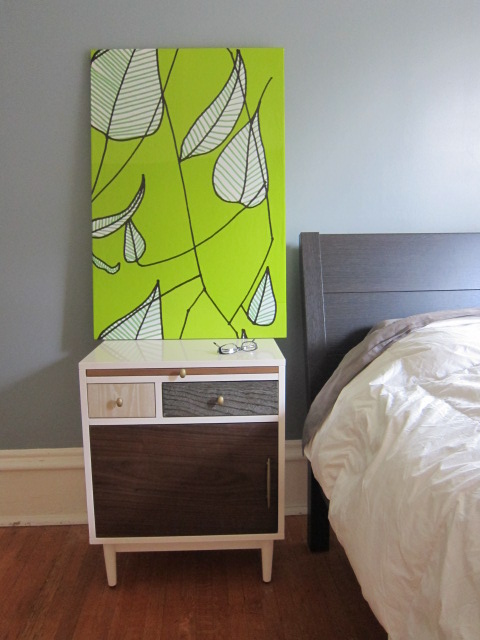
Take pride in the beautiful art you made and display your favorite fabric in your home!
I was just thinking of a great (but not as quick) way to make it a bit more DIY: You can trace over the fabric print (especially one as geometric and simple as this one!) with a piece of tracing paper. On the back, scribble with a pencil, then on some artist canvas, trace it again, the graphite scribbles will act like carbon paper and it will transfer the image. Grab your paints and bam! Your own piece of art.
It would be cool to take that print and do it in several colors!
Great idea!
Merci pour l’idée géniale.🤩
Thanks for the post/tutorial, Stacey!!! 😀 I’ve been wanting to do this with a fabric panel I got about 6 mos ago. I have coordinating fabric to “update” my couch pillows, but that will be a project for a different day. After your post, I went to Michaels and bought some inexpensive frame stretchers and a basic staple gun ($28 bucks all told with a 40% coupon). It came out pretty good for my first try. The only thing I didn’t count on was the “wonkiness” of the frame stretcher, but I’m pleased with the result all the same. 😀 I’ll post a picture on your FB page.
ooh, can’t wait to see!
Now this is a really neat idea! Thanks for this, adding to my Pinterest board now 🙂
Es muy sencilla, y como resguardar la tela del polvo y otros?
I have an idea for this too!