Weekly Planner: free printable! (+ suggestions!)

Free Printable Planner from FreshStitches and Shiny Happy World

Planners are a big deal. They can get really fancy. And there are planner people to follow on instagram. Whoa.

It’s a little overwhelming!

I’ve always struggled with finding the right planner for me. I love having a paper planner, but I always found it hard to find the right one. Some have a page for each day (I don’t have nearly enough going on!) and some are monthlies (I need more than an inch to write all my appointments for a day!). I just want a lovely, weekly planner. With room for a to-do list. And a way to separate those things I have to do on Tuesday from the things I have to do sometime this week.

So, I designed my own

I know! It’s such a Stacey-thing to do!

FreshStitches Planner page

FreshStitches Planner page

I posted a photo to instagram, and you guys LOVE it! And want to do it yourself! Sure, why not?

Download the Printable!

Now, I know this planner won’t be perfect for everyone. After all, I made it just for me!

Let me tell you a bit about the features. One page is the ‘weeklies’, an overview of the week. I have a box for the weekly to-do list (things that I can do anytime, but need to get done that week), a checkbox task (things that need to be done every day, but it doesn’t matter when… like posting to facebook or checking email) and a meal planning area.

Freshstitches planner weekly todo list 8.5 x 5.5

You can download the Weeklies page in pdf format, here.

Then I have another page called the ‘Dailies’… things I schedule in for every day. You can see there is a blank space for the date, and a space to write a major task to work on each day. Below the date, I include appointments or items that have to be done that day (like 10am dentist appointment). I left a little space in the corner of the page for goals or mantras to keep in mind for the week. And I shaded out Friday and the weekends… a reminder not to schedule too many things for then!

You can download the ‘Dailies’ page in pdf format, here.

Make the Planner + Suggestions!

To make your planner, simply print both of these pages on 8.5″ x 5.5″ paper and have it wire bound! It’s a convenient size! I used 20lb paper (which is quite thin), so the resulting book isn’t too thick even though I printed out through the rest of 2017.

The wire binding means it lays open nicely on the table and you can see both pages at a glance. If you want to get creative, you can throw in extra pages (like a monthly calendar) on your own! Google ‘calendar printables’ for oodles!

You can write in the numbers and dates, but I splurged and bought these adorable number stickers. They fit perfectly. I also love these fun travel stickers. And of course I have my knitting stickers by Symposi Press.

It’s so much fun!

I hope you enjoy! And tell me about your planner!


Save

5 Tips for Selling Your Crochet Items

It makes me so happy that many crocheters use my designs as a way of making an income for themselves… by selling the finished items! (Yup, it’s allowed! Read here)

I’ve asked Michaela, the woman behind Crochet City KC on Etsy to share some of tips for selling crocheted items.

Hopefully, these tips will help you avoid some common problem spots and sell with success!

And a huge thanks to Michaela for taking the time to write this guest post!

1: Get Payment up front for Custom Orders

When I first started crocheting I was very lax in requiring payment for my creations. Since then, I have revised my policy to require payment up front on orders, as I had a few bad experiences of not receiving payment for my work.

Here’s an example: I took an order for a very large project that took me about 6 months and a large amount of yarn. And although I had quoted the person a price at the beginning of the project, because this person was a coworker, I didn’t feel comfortable asking for money up front. When the project was finished, the customer claimed I had quoted a lower price, and I felt like I needed to take it because there was nothing in writing and the work was already done.

Crochet Owl by Michaela

Looking back, I realize how silly I was for not standing up for myself and its definitely one of the experiences I look back on most and think to myself… wow I’ve come a long way! Trust me, you want to receive the money up front for your hard work!

2: Always Communicate!

I can’t express enough how important communicating with your customers is, if you think something isn’t turning out quite right, you aren’t sure about exactly what a customer wants or if you are behind on an order communicating from the beginning is so much easier then dodging them and then having an upset customer in the end.

For example, one time, I received an order for a blue octopus. But what blue? Royal blue? Light blue? Green blue? or who knows what kind! Instead of guessing, I took my phone to the store and sent photos of the various blue yarns available. I sent picture after picture until we found the right one, and I’m so glad I did. The little boy who received the octopus sleeps with it every night and it matches his bed room perfectly, which would have never happened if I hadn’t taken the time to clarify the customer’s desires.

3: Be Honest about Your Abilities/Time

Sometimes, a request may be out of your crochet comfort zone or just may take too much time for you to complete. Earlier this year a customer came to me asking if i could re-create a very complicated monster from a TV show and after looking at all the detail and weighing the time it would take, I decided to turn down the customer.

It may sound bad to turn down an order, but it’s actually much better than getting in over your head and being unable to deliver. It’s in everyone’s best interest to just be honest about what is in your comfort zone.

4: Keep Accurate Records

In my experience, customers often change their minds or “forget” certain aspects of your original discussion. If there’s no record of the original discussion, this can lead to disappointment!

I do a lot of orders through Etsy and Facebook (which automatically leave a written record), but there are often times I take orders in person. If I take an order in person I write out the details of what they what and have the person look over each detail and sign off on it – that way they are acknowledging it and I have proof later in case they decide they want something different.

crochet crinkle toy

Last year I had a customer ask why the item they ordered had blue eyes when they asked for green. I was able to send them a copy of their original message to me where it stated exactly what they asked for. Needless to say they were happy about their blue eyes after that!

5: Put Yourself out There!

I am a very shy person when it comes to meeting people and socializing, so this advice is a little weird coming from me. One of the biggest favors you can do for yourself if you are trying to sell crocheted item is to put yourself out there. No one will know about you unless you tell people!

Maybe your version of telling is maybe just carrying around your crocheting in public and having a business card on hand for when that person who asks “What are you making?” You can easily tell them and then point them in the direction of where they can see more of your work!

Just try one little act of putting the word out about what you do and chances are it will go a long way. I’m not the most active facebooker/etsy seller/tweeter in the world but I still manage to keep pretty busy with orders by just putting it a tiny bit of effort every so often!

Thanks, Michaela!

Why does Disney ‘go after the little guys’?

Disney’s characters are copyrighted. You can’t use a drawing of Mickey Mouse and sell it on a mug, unless you have authorized consent to distribute the image.

Disney has a reputation for being ruthless about protecting its intellectual property (example stories of folks getting sued here and here).

cartoon lawyer

This leaves a lot of questions from crafters asking, Why does Disney go after the little guys?

In short: they have to

I’m not a lawyer (disclaimer!), but since I’m in the crafting industry, I have a fair understanding about copyright.

Let’s pretend that Disney finds out that Crissy Crafter has been using images of Mickey Mouse without permission.

Then, let’s pretend that Disney decides she’s ‘too small’ and doesn’t do anything about it.

needle

What happens?

In this case, Disney has put itself in a very sticky situation. By failing to press charges, it can be argued that they are ‘allowing’ this illegal usage to occur, and may have trouble defending future cases.

So, they have to pursue every case they find!

What’s a crafter to do?

Disney, as the creator of these characters, has the right to defend the images.

As a crafter, your best course of action is to just do what’s right. Don’t design and sell crochet patterns of Mickey Mouse. Don’t sell necklaces with drawings of Mickey Mouse. Violating someone else’s copyright can get you into trouble.

cant do that

It’s also unfair a crafter to benefit by using someone else’s brand. By selling ‘Mickey Mouse necklaces’, you’re giving the impression that you have an official connection with Disney, and you are piggybacking off their fame to generate sales for yourself.

Be creative! Come up with your own unique designs and characters! And stay out of trouble!

Comments, welcome!

As always, I welcome comments on this blog post.

However, from past experience, I know that blog posts about copyright are controversial and generate heated discussion.

My goal in writing this post was simply to explain to crafters one motivation behind Disney’s enforcement of its copyright.

As I am not a legal expert, I will not reply to any questions/comments about what is/isn’t copyright infringement. Thank you in advance for understanding.

Best,
Stacey

How do you tell if something’s worth doing?

Last week, I wrote about How to Say ‘No’ (and rescue your schedule). I’m so happy to hear that so many of you loved the post! I was thrilled to read so many comments!

One question that popped up in the comments was, “How can you tell if something is worth your time?” It’s an amazing question, and one I’ve been thinking about a lot.

let go of tasks that don't serve you

Not everything will be fun…

The tricky thing about this question is that the answer isn’t obvious.

“Only do things that are fun” is bad advice. I mean, you should go to the dentist, right?

“Only do things that are good for you” seems similarly misguided… in real life, it’s okay to have an ice cream sundae once in a while!

sundae

The truth is somewhere in between. Something can be worth your time for a variety of reasons, but it’s important to make sure the cost to yourself is not too steep.

Here are a few questions to ponder when considering whether something is worthwhile for you to tackle:

  • Are you the only person who can do it?
  • Is the benefit that comes from you doing it greater than the mental/physical cost to you?
  • Is it fun? And relatively harmless?
  • Is it good for you?
  • Would you feel relieved if you did it?
  • Do you think life would overall be better if you do it?
  • Can you do it without causing immense distress to your own life?
  • Would the cost of outsourcing the task be too high?
  • Is it something you could be proud of doing?

These are really great questions to ask yourself… and I’m sure you can come up with a few questions of your own.

Questions in action

Let me give you an example. This week, I did my taxes. They’re really boring and awful, and there are about a million things I’d rather be doing than my taxes.

woman looking at clock

But, because I run FreshStitches, I’m literally the only person in the world who can accurately compile the numbers for my business. Only I know where the relevant spreadsheets, receipts and forms are in my office. And, really, once I got it done, I felt proud and satisfied. And it only took me a full day to do, which is worth it considering the cost and hassle it would have taken to hire the task out.

What’s a task that I turn down? I’m often asked to design a custom pattern. I know doing so would take more than 25 hours, and involve even more time when you account for emailing sketches back and forth, making changes, etc. It’s not a task that can fit into my schedule without having massive disruption. And I’m not the only one who can do it… a customer has a very high chance of finding another willing designer!

Are you guilty of accepting tasks you shouldn’t?

Or, do you have a really great question you ask yourself when deciding whether something’s worth your time?

I’d love for you to share your experiences!

Best,
Stacey

A Peek Behind the Scenes at My Product Photography Set-Up

How I shoot all my product photography - behind the scenes at Shiny Happy World

Remember that survey at the end of last year? A lot of people asked how I do all my product photography. People asked about how I get those seamless colored backgrounds, what kind of lights I have, what kind of camera I use and more.

So here’s the scoop!

My product photography set-up is amazingly uncomplicated. Paper. Foam core. A window.

I’m not kidding.

A Peek at My Photography Set-Up - Shiny Happy WorldThere it is. My window. I don’t have any lights so this is it.

Early in the morning the sun shines right in there – which is not so good for photography. Too much glare. That means I shoot all my photos in the afternoon – or I have to tape a piece of plain white tissue paper over the window to filter the light a bit.

That’s my big Ikea-hack ironing board I use as a table. I’ve got a piece of foam core sitting on it for a stable surface. On top of that I’ve got a backdrop of two pieces of foam core that are taped together (hinge-like) with masking tape. It’s easy to fold up and store away, and easy to set-up for a quick shoot.

My backgrounds are big sheets of paper in my favorite colors. See how this one is pinned low to the hinged foam core so that it covers part of the “floor” too? That’s how I get a seamless background.

A Peek at My Photography Set-Up - Shiny Happy WorldThis is what it looks like from the inside. That white board to the right bounces all kinds of sunlight back onto whatever I’m shooting and fills in the shadows nicely. I can often lean in and use my elbows as a tripod, but I also have a little tripod that I set up sometimes.

This is how I shoot almost all of my cover images.

A Peek at My Photography Set-Up - Shiny Happy WorldFor most of my step-by-step photos and photos of finished objects that don’t need to stand up, I use this shorter set-up.

It’s pretty much the same as the first set-up, but the foam core sheets I use for the frame are about half the height, and the background paper doesn’t wrap up the side.

With this set-up and a step stool (or sometimes a small ladder) I can shoot straight down onto whatever I’m photographing.

A Peek at My Photography Set-Up - Shiny Happy WorldHere’s what it looks like from above.

Look at the amount of light inside the box, compared to the light outside the box. It’s amazing what just two white surfaces can do! Sometimes I’ll box in that third side too (I just prop up another sheet of foam core) but usually it doesn’t need it.

A Peek at My Photography Set-Up - Shiny Happy WorldI like the way this set-up gives me just a little bit of soft shadow on each object- nothing harsh or distracting.

That’s it! Dead-simple and dirt-cheap product photography.

Oh – and my camera is a Fuji FinePix S700 – nothing too fancy or expensive. I like the grip on it – I can shoot one-handed when necessary. I think it has a manual setting – but I’ve never used it. I like to just point and shoot. 🙂

Update – my Fuji finally died so I bought a new phone with a much better camera – the Google Pixel 2. I love it – especially that it wirelessly sends all photos to my laptop. Fancy!

Oh – and that sweet monster is Byron. He’s one of the Oddballs and totally fun to make. You can get his pattern here.

Do you have any more questions? Just ask in the comments here and I’ll answer them.

edited – Abby asked a question in the comments about why I use colored backgrounds instead of white. You can read my answer in the comments, but I actually have a photo of Byron against a white background that I can show here side by side with the green.

A Peek at My Photography Set-Up - Shiny Happy WorldI don’t think the white looks bad – but the green background is more shiny and happy. 🙂

Happy Thursday!

Best,
Wendi
Wendi_Gratz_Shiny_Happy_World

Peek Behind the Scenes: My Book Proposal!

My new book, Modern Baby Crochet, was released last week… and I’m so excited about it!

The seed of a book is planted when you write a book proposal and submit it to a publishing company. I thought it would be fun to share some of what goes into writing a book proposal… who knows, you may want to write one yourself!

Getting Started

I knew that I wanted to do a crochet book full of nursery patterns… but you need more than that for a book proposal. A publishing company will expect you to explain what makes your book exciting and different from all of the other ones on the market.

crochet argyle afghan

I had a look at the books on the market, and saw that there was a place for a book full of modern nursery decorations, particularly using ‘non-standard’ nursery colors like greys, rainbows, neon brights and neutrals.

The process of submitting a proposal varies by publisher, but Martingale (the publisher of my last 3 books) makes it easy: a proposal packet is available for download on their website!

Other Things to Think About

Although the particular questions you are asked to answer vary by the publishing company, here are some basic questions you can expect to see.

  • What makes you qualified as a designer? What other work have you done?
  • How is your proposed book different from what’s already on the market?
  • Can you demonstrate that there’s a market for the book you want to write?
  • Do you have enough projects for a book? Are you including reference material beyond the project instructions?
  • What’s your timeline?

Filling out this type of information for my proposal was easier because I’ve written two (successful) books. But, even though I didn’t need to convince the publishing company that I was capable, I still needed to carefully articulate the concept behind this book and explain why it would be fabulous!

Samples Sell!

No matter how amazing your idea is, your proposal might get passed up if it isn’t obvious to the publisher that your idea is fabulous.

It’s important to include as much information about your proposed designs as possible, including sketches and maybe even samples.

Since I typically design stuffed animals, I thought it was important to include (miniature) samples of a few of my nursery designs.

I made a little afghan:

mini rainbow afghan

Which, as you can see by my hand in the picture, is only about a foot long. However, even a tiny piece helped to convey my idea for a rainbow-colored granny square afghan:

rainbow granny square afghan

I also crocheted a very tiny circle:

small crochet sample

… that showed the start of the pattern for my Monochromatic Spiral Rug:

baby rug

Obviously, the size isn’t too important… but it is key to use the samples to demonstrate stitch detail that might not be illustrated in a sketch or written description. For the rug, I was interested in showing the join of the rounds, the non-circular overall shape and the slight spiral of the rounds.

This tiny cutie showed off the basic triangular shape…

triangle toy

… that would turn into the Crinkly Triangle Toy!

Then the hard part… waiting!

After you’ve followed the publisher’s instructions very carefully and submitted your proposals and samples, expect to wait a month or two to hear back from the publishing company. The decision is usually made by an acquisitions team that might only meet every month or so to discuss new submissions.

In my experience, if the publishing company likes your concept but thinks it needs a little tweak, they’ll contact you to discuss instead of tossing your proposal out right away.


This is what happened with my first book, Cuddly Crochet. I had proposed a book of stuffed animals, and they asked if I’d be interested in adding some baby items. And I was happy to!

Book Review: So You Want to be A Knitting Designer…

Being a knitting/crochet designer is kind of a weird job. Being successful means being part designer, part webmaster, part marketer and part photographer. And you can’t go to school for it. (okay, you can go to school to learn to design, but not do all the other stuff!)

I learned it through the grapevine…

Most of what I know about ‘the biz’, I learned from other designers. Chatting on online forums. Talking in person at trades shows. It took me years to feel like I really got what was going on.

FreshStitches and Space Cadet

That’s me and Space Cadet pausing for a photo during a chat-session!
I can’t tell you how much I learned about marketing and my brand by chatting late into the night with other designers at conferences!

But now… the Reference Guide!

If you’re a newbie designer, you’re coming in at a great time! You don’t have to spend big bucks traveling to conferences to find out about the ins and outs of the industry… there’s a book about it!

So you want to be a knitting designer

Alex Tinsley (designer behind Dull Roar and also Designer Liason with Malabrigo) has just written an ebook that tells you (basically) everything you need to know to be a knitting or crochet designer.

I just read it. It’s awesome.

Not only is Alex hilarious, but the information in the book is dead-on. She gave me permission to post a looky-loo at the table of contents:

Knitting Designer Book

So You Want to Be A Knitting Designer covers how to write patterns, hiring a tech editor, photography, self-publishing, how to work with magazines, marketing, what to do if your idea is stolen, how to wholesale to yarn stores… you name it!

Is this book for you?

Alright, so let’s talk about what this book does and doesn’t do.

This book:

  • gives you real, authentic help for becoming a designer: including a pattern template, sample emails for sticky situations and advice about submitting proposals that you really need for real design life.
  • gives you a comprehensive list of resources for finding tech editors, hiring photographers and chatting with other designers.
  • walks you through the basics of the industry (including the dos and don’ts of asking for yarn support!) in a friendly and honest manner… from someone who’s worked in lots of different parts of the industry.
  • leaves you feeling confident about doing knitting design as a career (it’s hard, but not mysterious!)

Although the book has ‘knitting’ in the title, it’s equally applicable to crochet designers, too!

This book is intended to helping someone who’s seriously thinking of designing navigate the industry, and already has some knitting experience. It doesn’t contain lessons on how to design, detailed help with taking photographs or address the financial/tax/contract aspects of beginning a business.

Get it!

I would really recommend this book to anyone interested in becoming a designer (whether it’s part or full-time).

Visit Alex’s website to grab your copy of So You Want to Be A Knitting Designer…!

Not only does it distill lots of information that’s available in thousands of posts online into one fun & readable document, but it also contains a little bit of extra information that many designers aren’t always willing to post in a public forum (such as how much tech editors are usually paid and examples of email templates in sticky situations).

I’m so happy Alex wrote a book like this… the industry really needed one!

disclaimer

How to Publish a Craft Book: 7 things you need to know to get a contract

This Monday, I was lucky enough to speak on a panel with Abby Glassenberg (author of The Artful Bird and Stuffed Animals), Kari Chapin (author of The Handmade Marketplace and Grow Your Handmade Business) and Jennifer Urban-Brown (editor at Roost Books) about publishing a craft book.

Craft Publishing Panel brookline booksmith event

It was a fabulous bunch of ladies and a lot of super-helpful information about publishing a craft book came to the surface. But what about those of you who couldn’t make it to Boston to see us? It’s not fair that you should miss out, is it?

So today, I’ll tell you some tips for getting started publishing your own craft book.

traditional publishing

1. Consider how a book fits your life

When speaking on the panel, we all agreed on one thing loud and clear: writing a book isn’t for everyone. You probably won’t become rich and you’ll spend at least a year of your life (maybe not solid, but at least a year from idea to finished book) working on it.

You need to be passionate about your topic. I, personally, view writing a book as a leg of my existing business. Before beginning this adventure, make sure you’re ready!

2. Everything you need is online

Craft publishing is easier today than it has ever been before. Many craft publishers post their proposal package/submission criteria on their webpage! You don’t need the email address of an editor or inside information… following the proposal package instructions carefully is enough to get your book idea read!

3. Shop around

Not all craft publishers are the same. Some publishers may specialize in ‘niche’ crafts (zombie-themed basketweaving, perhaps?), while others may have strengths in particular crafts (such as quilting). Before sending in your proposal, spend some time researching different publishers.

craft books on bookshelf

This isn’t hard: walk around your bookstore and look at the available books. Which publishers catch your eye? Which suit your style (modern, quirky, etc.)? Publishers are likely looking for books that fit within their existing market.

4. Sell yourself and your ideas

When you send in a proposal for a book idea, you need to sell yourself. This is your one chance to get your ideas in front of an editor’s eye.

A good proposal:

  • follows all of the proposal guidelines, and includes all requested information
  • is well-thought-out, including a table of contents and photos/samples of project ideas
  • contains information about your professional experience: evidence that you can really write a book!
  • discusses market information: what makes your book different from others on the shelves? Are people interested in the craft you have to offer?
  • looks clean and professional (including a nicely-designed, but not over-the-top package, if that fits your brand)

5. Expect revisions

Between all of us sitting on the panel, we’d written 6 books. At least half of those book proposals elicited a, “gee, it seems like you’ve got great ideas, but I’m not sure this exact one will work…”

Don’t be discouraged! That’s good news! It means the publisher likes you and wants to work with you on an idea that will make a best-selling book.

It’s not unusual for your plan to undergo serious revisions due to suggestions by the publisher. Keep in mind, the publisher’s business is publishing: they give good advice!

6. Don’t get discouraged

You didn’t get an encouraging ‘let’s talk!’ phone call from the publisher? Don’t despair. Maybe your idea just wasn’t up the publisher’s alley. Maybe you didn’t provide enough evidence that pastel-colored polymer clay tiaras are the next big thing.

keep trying

Keep trying. Think about your concept a little and try another publisher.

7. Prepare to negotiate

You’re getting a contract? Congrats!

But they want you to finish the book in 4 months? Or pay for your own photography? There’s no ‘right answer’ for what makes a good contract, but it needs to be something that you can live with.

Many authors negotiate their contracts, so don’t be afraid to ask questions and get something that can work for you.

And then the work begins…

Once you land the book deal, the real work begins! Tips for how to actually write the book are a topic for another day!

Best,
Stacey

Spreading the Love of Crochet Design

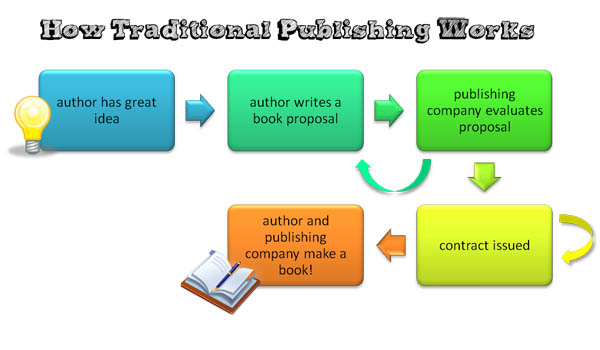
I teach people to crochet. More specifically, I’m very keen on teaching folks how to crochet adorable stuffed animals. I also teach crocheters how to create their own stuffed animal designs.

teaching crochet at craftsy

This last aspect of my chosen career has raised some eyebrows. I’ve been asked, “Aren’t you diluting your brand by teaching others to crochet like you?” and “Aren’t you creating your own competition?”. Wow. Big questions.

Today, I’m going to chat about my answers to questions, and share with you the reason I teach design: because folks from my classes are becoming designers and releasing their own patterns… and that makes me ecstatic! Isn’t that why teachers teach? To see students put to practice what they learned? I think it is!

FAQ: Fears about teaching design

I understand where these fears come from. It’s tough to make a living selling $5 patterns, and so there’s a natural defensiveness that can arise.

But I don’t think of my job as competitive. My job is to publish high-quality crochet patterns featuring designs in my own, unique style. And people who like my style might buy my patterns.

It’s hard for me to get my tail feathers in a ruffle when a new designer comes along. Miss New Designer has her own style! Some people will like it, and that’s okay. People will still like my patterns.

I’ll answer a couple of frequently asked questions.

Q: Don’t you think that teaching other people to design in your style will dilute your brand?

No, I don’t.

First, I teach certain techniques (like crocheting through the back loop and crocheting spiral rounds) because I think these create a better crochet fabric & overall design. In my opinion, these are techniques for your crochet toolbox, not ‘secrets’ of my style. I wasn’t the first person to ever use the back loop in crocheting, and I won’t be the last!

Second, ‘my style’ is something that’s difficult to teach or copy. My style is the ideas that pop into my head. My style is my judgement call about whether a nose looks better attached to round 8 or 10. I’m not trying to teach ‘my style’ because I’m not sure that I could! What I teach is methods for allowing crocheters to express their own style in the form of a unique design and, if they want, a crochet pattern.

Third, my brand is more than just my designs. My brand is a reputation for incredibly clear and photo-rich crochet patterns. It’s my commitment to replying to questions via email in a quick and helpful manner. It’s my blog, full of tutorials and videos. None of those things are diluted by teaching others to design.

Aren’t you afraid you’ll sell fewer patterns if there are more designers?

Not really. Keep in mind: there are always going to be more designers! You can’t stop that.

A revised question might be: can there be too many crochet stuffed animal designers? And I don’t think so. There’s a very interesting phenomenon that happens: the more people do something, the bigger the niche grows.

I’ll give you an example. Let’s pretend you were a computer manufacturer in 1980. You were probably one of the only two manufacturers in existence. But, there were only a few thousand people using computers. What happened over time? The more manufactures built computers, the more customers bought computers. Which meant that owning a computer was more useful: more friends had them and more software was being made. The entire niche grew. Now there are dozens of manufactures, but there are billions of users. The number of customers per manufacturer has increased, despite increased competition.

And that’s how crocheting is. It’s a myth that there are x number of crocheters out there that us designers are fighting for. As more people crochet, it’s more likely someone will think, “hmm… my friend makes those cute animals, maybe I’ll give it a try!” We’re constantly adding to the pool of crocheters.

Is someone going to steal your designs?

Here’s another truth: if someone is steal your design, they’re going to do it. In fact, oodles of crocheters already have the skills to copy a design, even without the benefit of my fabulous teaching skills.

I’m not making the problem any worse by teaching crocheters to design. I’m training crocheters to come up with their own designs! To put in yarn ideas that come from their own heads! If anything, I think I’m solving the problem of knock-off-ing.

Anyway, every student I’ve had (in real life or online) has been a real joy. Once we’ve spent hours together, it feels like we’re friends. If anything, it’s my students who are the most protective in online forums about my rights as a designer. Because we’ve built a relationship of trust. They’re not in it to steal my designs or hurt me!

Meet who makes me happy!

Okay, now onto the fun stuff!

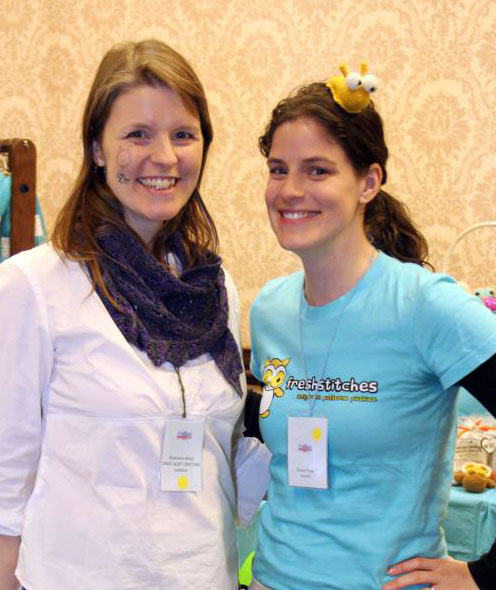
I want to introduce you to two ladies who make me deliriously happy. They’re students of mine who are budding designers!

Hollie!

Hollie is a sweetie, who also happens to be one of the moderators in the FreshStitches Ravelry group. She’s the one who puts together the amazing swaps that happen in the group, and also the one who surprised me with the FreshStitches Cowl that I chatted about as being one of my fave pieces.

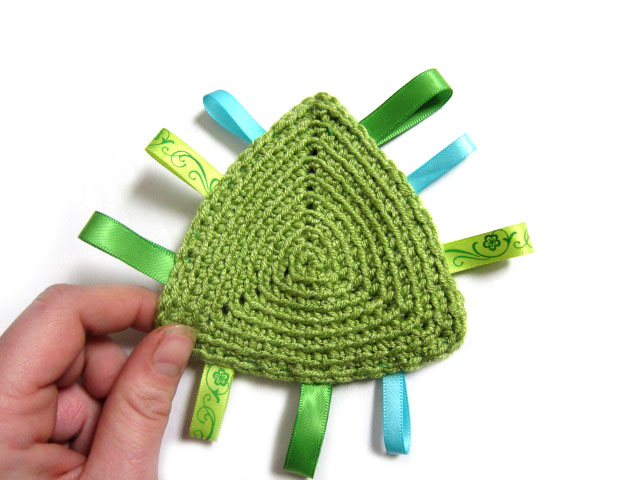
Introductions aside, Hollie just published her first pattern this week!

Triceratops lovey crochet design

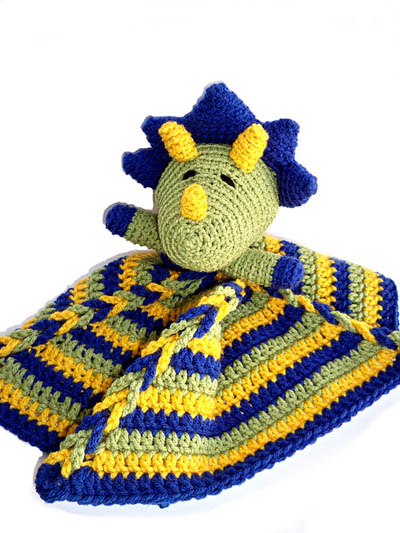
It’s a Triceratops Lovey… and isn’t it amazing? The triceratops is just stinkin’ adorable, and the detail on the lovey is fantastic. I couldn’t be more thrilled!

Love Hollie? Check out the lovey, find Hollie on Ravelry and check out Hollie’s blog!

Alyssa!

If you follow this blog, you know Alyssa! She’s the author of the much-loved What does Amigurumi Mean? blog post and also winner of the Slug-a-long. Alyssa is a smartie with a fabulous photographic and styling eye.

Alyssa also just completed her first design:

amigurumi crochet horse

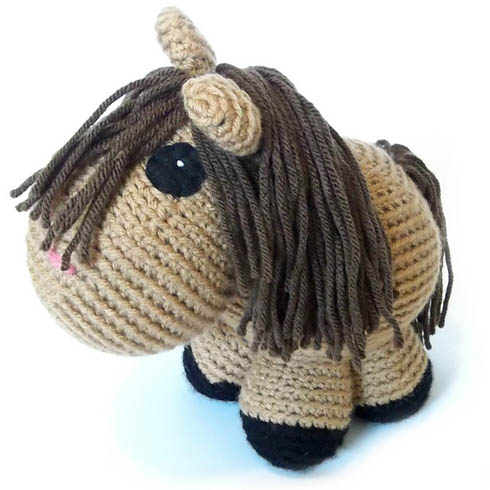
An adorable horse! It’s still in the pattern-development stage, but rumor has it that it’ll be released as a pattern next month. So exciting!

Love Alyssa? find Alyssa on Ravelry!

Do you see why I do what I do?

With great students like this… teaching is such a fabulous experience!

how to design crochet class

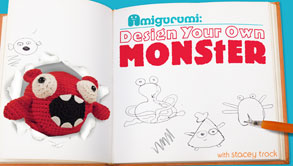
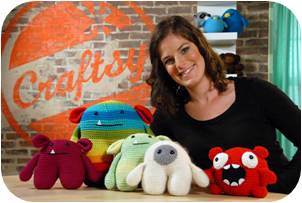
If you think you’d like to give designing a shot (even if it’s just for your own fun!), come over to my Design Your Own Monster class!

5 reasons to love your LYS

“I can order it online for cheaper”

Yup. It’s true.

In the internet age, where everything is available online for a discount, some people are wondering why it’s worth shopping at a local yarn store (LYS).

My suspicion is that many people feel this way because they haven’t yet discovered what an LYS truly offers. A good LYS is about way more than buying yarn: and once you know that, you’ll find it easy to support your favorite shop.

Why online shops can offer a discount

Don’t get me wrong: I shop online, too. Sometimes I’m looking for a yarn that my LYS doesn’t carry. Many online yarn retailers are also LYSs (like Jimmy Beans Wool and WEBS), so I’m in no way trying to convince you that online shopping is bad.

But there’s one unavoidable truth: you get what you pay for.

Why can online shops offer a discounted price on yarn? Because the costs of running an online shop are different than running a store front. An online shop has lower operating costs than a retail store, and they’re able to pass that savings onto the customer.

True, you may be able to buy that same yarn or book online for cheaper. But you’re missing out on all of the extra goodies that come with buying from an in-person shop.

What LYSs offer that online shops can’t

Besides the obvious plus of being able to see & touch a yarn in person (and who doesn’t want to do that?!?), there are some major benefits to shopping at a great LYS.

A good yarn store is the new town square. You know how in the old days, people used to gather in the town square to catch up on gossip and see their friends? That’s what a good yarn store is like. You can gather in a comfortable space, knit, chat with friends and get the newest yarn gossip from folks in the know.

A yarn-store owner is a curator. Have you heard of the paradox of choice? It’s the idea that selecting from 100 different yarns is daunting. A yarn store owner acts as a curator, stocking their shop with the loveliest in the land.

I can say this because I go to the annual trade show: there are a bewildering number of yarns out there! In a LYS, the owner has hand-picked a selection suited to the local market. Does the such-and-such brand have a bad rap for deteriorating in the wash? Your LYS owner knows about it and isn’t stocking that icky yarn… because they know that stocking a sub-par yarn would reflect poorly on their shop.

LYS employees are personal shoppers. How many stores can you go to where there is often an employee dedicated to helping you select the best fiber, thickness and color for the project you envision? That’s extraordinary service in most shops, but more or less standard at LYSs.

Samples. I don’t think I even need to say more! A typical LYS has samples of yarns worked up, so you can see an example of a finished product. No getting tricked by weird pooling. No getting fooled by how soft it’ll be.

Help when you need it. Don’t abuse this privilege (trust me, it just creates an awkward situation!), but most LYSs have the policy that if you bought the yarn/pattern in their shop, you can pop in for 5 minutes of free help. Most of the time, a touch of help from an expert looking at your work is enough to set you on the right path. Priceless.

What’s your stance?

Have you discovered an LYS that you love? What makes it great?

Do you have ‘a policy’ about when you shop online and when you visit a store?

I’d love to hear your thoughts!

All photos in this blog post were taken in Knit New Haven, one of the shining examples of what a great yarn store should be.