


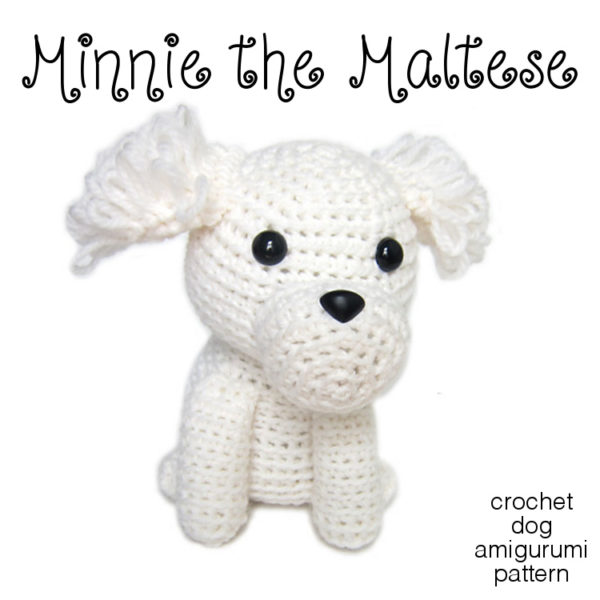
I love the loop stitch. It’s a fabulous textured stitch that you can use to add loops to any crochet work. It’s a stitch I’ve used to make a squirrel tail and fluffy ears on a Maltese.
Unfortunately, I think a lot of people are scared by the loop stitch, thinking it’s too complicated or tricky. But I’m here to help… because I want everyone to feel confident with the loop stitch!
Here’s the lowdown: there’s one very common mistake that many people make when crocheting the loop stitch. And, it’s a mistake that will cause your work to get big holes in it.
The good news is that I’ll show you how to avoid this mistake, and then the stitch will be easy-peasy! Plus, you can even snip your loops for a fabulous ‘hair’ texture… so keep reading!
How to do the Loop Stitch, in photos
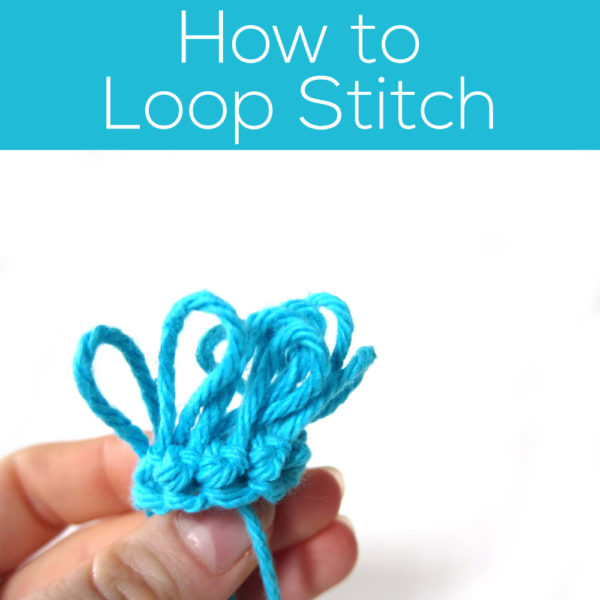
First thing’s first… let me show you how to do the loop stitch (lp st). For those of you who prefer videos, keep scrolling!
To do the loop stitch, insert your hook into the next stitch, just as you would for a single crochet.

Now, here’s the key part: we’re going to make the loop! Wrap the yarn around the index-finger of your non-hook-holding-hand (that’s my left hand, because I’m a right-handed), and plop that loop totally on top of your hook:

See how the there are two strands of yarn (the ‘start’ and the ‘end’ of your loop) on your hook? That’s what you want! Now, pull both of these strands making up your loop through the loop on your hook.
Your work should look like this:

Notice how it’s like there’s a twin-loop on the left, and a lonely loop on the right? That’s perfect. I know it looks different from other crochet stitches, but don’t let that scare you.
Now, wrap the yarn over your hook:

And pull the yarn through all of the loops on the hook. The right-side of your piece will look like this:

What?!? Where’s the loop? It’s on the wrong side of the work. I know, that’s weird. But it’s how the loop stitch rolls. Here’s a view of the back:

And here’s what it’ll look like if you keep crocheting…

How to do the Loop Stitch, video
I know some of you learn better through videos, so I made one for you!
The video begins after you’ve already inserted the hook into your next stitch, and are ready to make the loop…
What usually goes wrong…
Whenever I get an email asking for help with the loop stitch, I can usually guess what the problem is before reading the email. That’s good news! It means that there’s really only one part that usually goes awry.
And once you know that tricky spot, you can avoid it!
So, let’s have a look. Most people are pretty good at the ‘insert hook into next stitch’ part. It’s the ‘making the loop’ that causes the trouble.
Let’s see what happens if instead of catching both sides of the loop with your hook, you only catch one, like this:

Your finished loop will look okay at the start:

But, as you move your piece, you’ll notice that the loop will come undone:

And this will make a big hole in your work:

That’s sad. It’ll make your piece all holey… and there won’t be any loops left. So, don’t do it this way!
Go one step further… snip your loops!
Ever thought of making ‘hair’ for your amigurumi? Just do the loop stitch, and snip your loops!
So, let’s say you have your finished piece:

Grab your scissors, and snip each loop in half (at the ‘top’ of the loop):

And you’ve got hair!

If you’ve done the loop stitch correctly (by catching both sides of the loop as you crochet), then the pieces shouldn’t come loose!
Will you loop?
Maybe you’ll give a loop stitch pattern a try… or maybe you’ll be daring enough to add the loop stitch to a pattern you’re already working on! Report back about your results!

Here are handy links to all the posts teaching more fancy crochet stitches. . .
- How to Front Post Double Crochet
- How to Loop Stitch
- How to Crochet Bobble Stitch
- How to Crochet Picot Stitch
- How to Crochet Picot Bumps
- How to Wiggle Stitch
Return to the main table of contents for Let’s Learn to Crochet Amigurumi.
Move on to the posts about working with crochet patterns.
Happy stitching!

Thanks for the great tutorial!
I love the sound effect in the video, love it!
I’m amazed that you can cut the loops, I always thought one would have to latch hook in hair. Can’t wait to try this!
Nice video, I have never done this stitch, put I saw it in a hat pattern once.
Loved the video – SO helpful! Thank you.
thats what I do for my giraffes. then I take a brush to the edge to make it really fluffy <D. I'ts so much fun
You must seriously have a 6th sense about your patterns because I just started making the alpaca the night before you posted this 🙂 It’s so nice to have a step by step break down for a stitch I’ve never done before. I’m sure my little guy will turn out so much better for it!
I just finished the hedgehog. I loved making the loop stitch. Next time I make another hedgehog, I will make my loops shorter for the neck of the animal, so there is a bigger difference in the area between the head and body. But I love this adorable hedgehog. He’s going to be part of my youngest great-nephew’s Christmas gift. He’s so soft an squishy, I just love him. Thanks so much for this pattern, and for your tutorial about The loop stitch.
Rae
That’s a great idea, Rae! I never thought of altering the size of the loops to give a different effect, but of course now that you mention it… it’s brilliant!
Thank you ….. you made that all seem so simple after I have been struggling for the past hour looking and trying out different ways of doing the loop stitch. I´ve just completed a row of lovely little loops in about 5 minutes….. so again … thank you.
Thanks for such a clear explanation of this stitch! I had an idea in my head for a critter and this helped so much! 🙂
Thank you sooo much, I’ve been trying to master this stitch for the last couple of hours and your demonstration and tips has helped wonders!!!! I can finish the project I’m working on! 😀
This is a handy stitch! Thank you for the awesome tutorial! I learned to crochet amigurumi through your Craftsy classes so I am used to having those front loops on the outside. So I am experimenting with making a doll, and for her hair, making a loop stitch, pulling the loop to the desired length of hair, then placing the loop to the front on the side of the finished stitch and continuing on like that so the hair is on the right side. I haven’t finished yet, but it looks like it’s working well. Your classes and blog have inspired me to get creative with crochet!
OMG! It is so easy. The best tutorial! Thank you so much…on with the loopy baby booties!!!
Yay! Happy you’re a loop-stitch convert 🙂
I would love to have copies instructions of crochet animal toys. Thanks a lot.
You can check out all of my patterns at http://www.freshstitches.com/amigurumi/
I’m a crocheter to while away my old days before it ends.
Thank you very much for this tutorial! My problem was that I indeed took only 1 side of the loop, but I will try your way to do it instead. Thanks!
So happy to hear that I’ve showed you a trick that might help! 🙂
In order to get loops on the “correct” side of your work, do you do a row of regular sc in between the loop rows, or do you just make longer loops on every other row, and pull them through to the other side of the work?
Your first suggestion will work if you are turning your piece, but will not for pieces worked in the round.
The loop stitch is typically crocheted on every round, and you could pull them through if you’d like them to be on the right side.
Thank you for a great tutorial. My issues of holes and unraveling have been solved thanks to this.
Pingback: Lion Amigurumi - Willow Crochet
My name is pat I was wondering if you could help me I am making a baby’s jacket and they is something on the pattern says at the end of row this is wort it says pull a long loop we will work back across with the main yarn on row 5 I injoyed your video and I learnt a lot if you could help with my question I would be great fully regards pat
I’m sorry – I don’t know what they’re trying to get you to do. Maybe contact the designer of the pattern?
Thank you so much! I’ve been struggling trying to figure this stitch out and I’ve been crocheting for 40 years!
I did a afghan with the loop stitch and my loops shrink back and have to pull on them. Does this make sense? The loop doesn’t seem locked in, especially after project is washed
Thank you for the video. My daughter sent me pictures of a project with instructions. I could not get it. Watching this, I did it your way.