


Last week, I told you my top 5 tips for taking great photos. This week, I’m going to go into a bit more detail about how to get photos of items with plain white backgrounds.

Mastering ‘the white background’ is an easy way to get professional-looking project photos. This is how I take the photos of my stuffed animals for my website, skeins of yarn for my stash and small items that I’ve knitted/crocheted.
So, let’s see how to do it, step-by-step and without fancy equipment!
Step 1: Grab a piece of posterboard and find natural light
Last week, I showed you my setup: a piece of white posterboard taped to a box in front of a window:

The setup really is that easy!
What if you can’t find natural light? I’ve found this great tutorial on how to build a light box for $10, which might work for you. I’ve tried it, and while the box is easy to make, the lights that you need to cast a natural-colored light are pricey. If you use plain desk-lamps, you tend to get a yellowish tinge to your photos. So, trust me when I say it really is easiest to use a window- even if it means you need to take all of your photos at 1pm on the weekends.
Step 2: Use the Macro setting
We’ve all seen out-of-focus pictures like this:

Eep! What a disaster! Do I need a better camera? No!
I’m a big believer that you don’t need a fancy camera to take decent photos… you just need to read the instruction manual and know how to use the features that you have. Every digital camera has a ‘macro mode’ (with an icon that looks like a flower), and that’s all you need to get the photo in focus:

Isn’t that much better? You’ll want to use macro mode to focus on items that are close to the camera. No fancy camera needed.
The photo is still a little dark, though…
Step 3: Fix your exposure
Notice how the previous picture, while in focus, is a little dark? You need to increase the exposure (light) level. There’s two ways to do this.
Change the exposure settings on your camera. Most basic digital cameras do this… just read your manual! Here, I took the same photo with a higher exposure on my camera:

Edit the photo to change the exposure settings. Let’s say you’ve already taken the photo… you can also change the exposure in software like Photoshop or PicMonkey (which is free!). Here, I changed the exposure by photo-editing:

As you can see, both of these techniques get pretty similar results, and make a big difference!
Step 4: Crop or paint corners
Cameras, because of the curve of the lens, tend to leave photos with some darkness in the corner. For a totally white background, you’ll want to either crop the photo (cutting the corners out altogether), or use photo editing software to ‘highlight’ the corners and remove the darkness.
Here, I’ve cropped the photo:

And here, I’ve highlighted the corners:

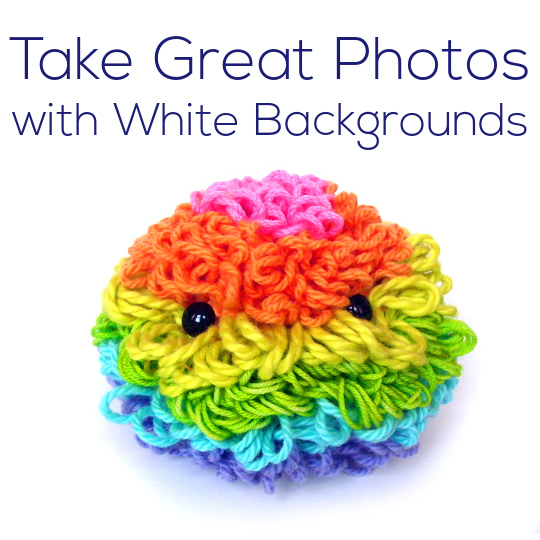
Step 5: Show it off!
Look at your fabulous photo! Show it around, proudly!
You can see Wendi’s simple setup for taking photos here.
Best,
Stacey
Very, very helpful. Thanks very much for this tip!
You are full of great tips! Thanks. I hadn’t thought about cropping out the dark corners or highlighting them. Going to try!
P.S. I’m enjoying your ebook about crochet – thanks again!
What a really helpful post!! I’ve just added “white poster board” to my shopping list. I know that great photos are going to be really important for selling my hand-made items. So many photos out there are horrible. Thanks for sharing your secrets!
Thanks, Annastasia- so glad it’s helpful for you!
I love that the posterboard is only about $1… how often can you get the materials you need for just that? 🙂
I found this article on Ravelry.com and just wanted to Thank You so very much for your detailed explanation of how to accurately take photos on white backgrounds. This was extremely helpful.
Looks nice, but I’m looking to take photographs with solid white background…
@Prusoth- Check out this more detailed blog post, which includes information on eliminating areas of grey with Photoshop.
Thank you so much!
that was very informative. Thanks for your help!!
Some useful tips indeed! Getting the exposure right and where possible using natural light is a must for a white background. Alas i always revert back to photo editing software 🙂
This is a great start to take photos of any product. To take it to the next level you can use an app like DropSpace to remove the background entirely, then let the AI do auto adjustments and make it even better.
What do you think?