


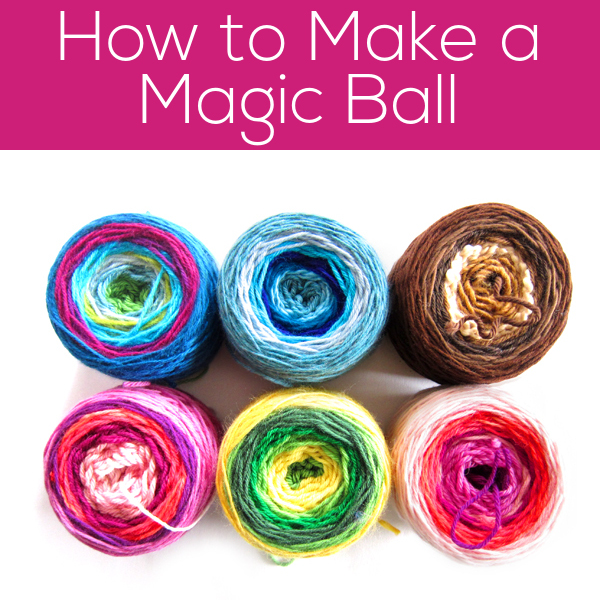
Have you heard of a Magic Ball?
It’s a ball of yarn that changes colors and textures as you work. It’s something offered by a number of artisan yarn makers… but it’s also something you can make yourself with your leftover yarn!
Besides ending up with an awesomely fun end-product… you’ll finally get to use up all of those weird leftover pieces of yarn that are too small (you thought!) to do anything with! How great is that?
Perfect for the scrap-a-long!

Magic Balls are fun to make… but they’re even more fun if you have a project in mind!
How about joining in on our scrap-a-long?
Ready to get started?
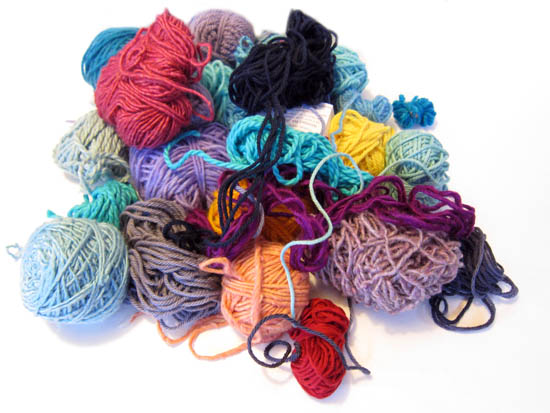
You’ll need two things. One, gather all of the leftover yarn bits that are lurking in your stash. You know what I mean. They’re too small for their own projects, but too big to toss out. You keep thinking you’ll do something with them…
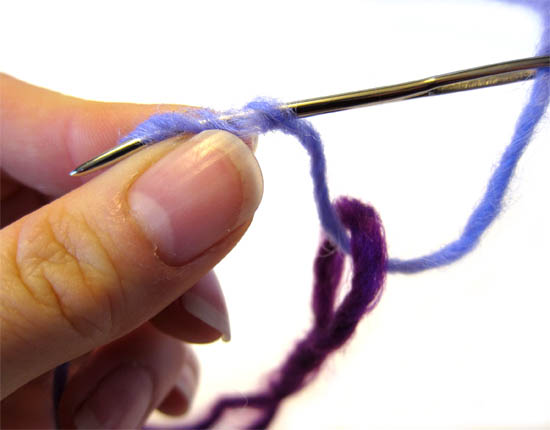
And a tapestry needle.
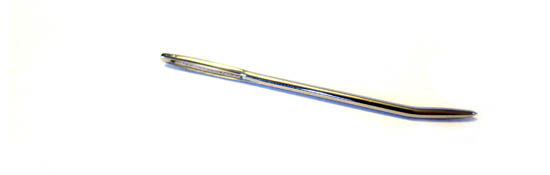
(mine is a bent-tip needle, but that’s by no means necessary for this. All you need is a needle that’s big enough to fit your yarn through the eye.)
Okay, now we’re ready to start!
We’re going to make our magic ball by joining all of these leftover yarns together using a technique called the ‘Russian Join’. The Russian join allows you to fasten yarns together without a knot, and it has the advantage of working with any type of yarn (unlike the ‘spit splice’, which relies on 100% wool yarn.)
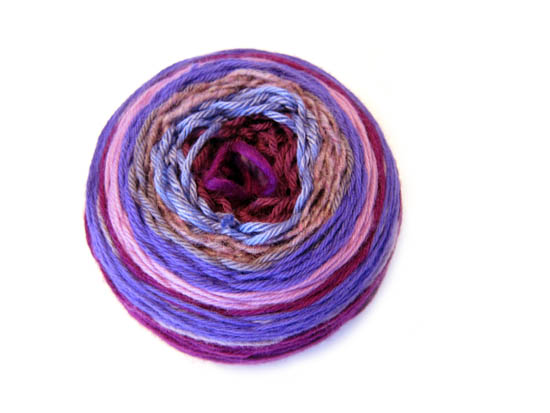
In terms of grouping your yarns together, you’ll want to group yarns in a way that is pleasing to you. Some folks prefer the random approach, but I like creating a color theme (check out How to organize your scraps for help!). For my magic ball, I’m attaching only various shades of purple. I also recommend using yarns of the same weight. My magic ball is composed entirely of worsted weight yarns.
How to do the Russian Join
Step 1: Thread your tapestry needle with yarn A (to start, yarn A will be an arbitrary choice. As you continue, yarn A will be the yarn that is attached to your ball).
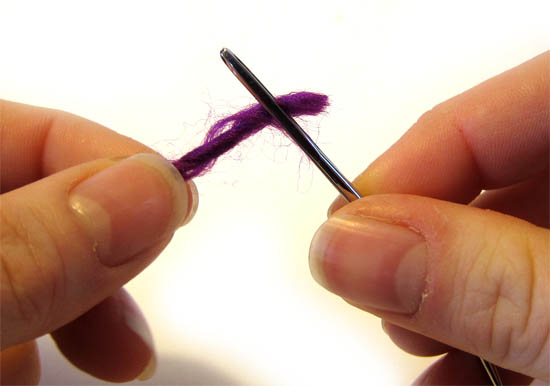
Step 2: About 2 inches from the end of the yarn, insert your tapestry needle through the yarn. Split the plies, and work the needle through the yarn for about an inch, then pull the needle through, bringing the yarn tail through this bit of yarn.
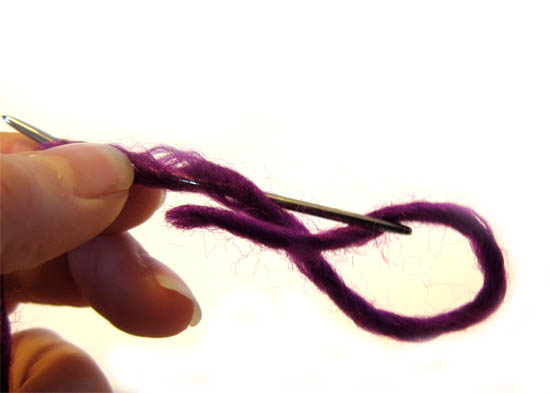
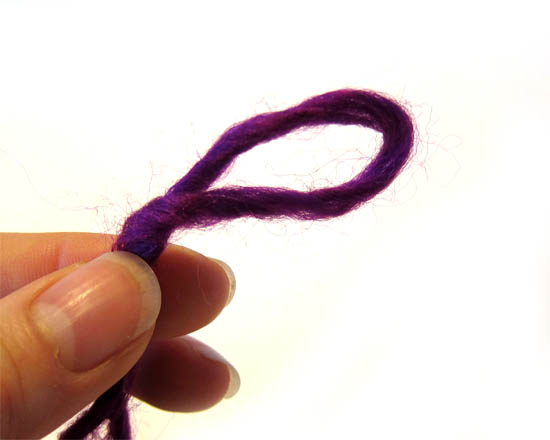
Notice that you have a loop!
Step 3: Okay, now, thread yarn B (the other yarn) through the tapestry needle, and stick the tapestry needle through the loop in yarn A.
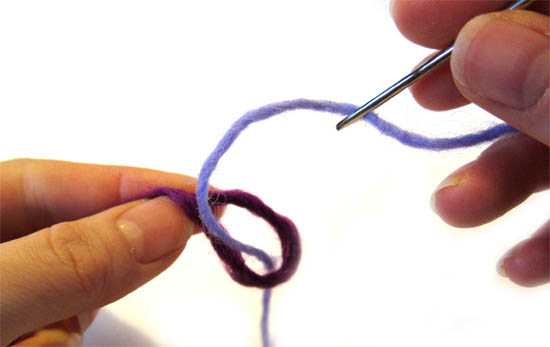
Step 4: About 2 inches from the end of yarn B’s tail, insert the tapestry needle through the yarn… just like you did before.
Now you’ve made a second loop, joined onto yarn A!
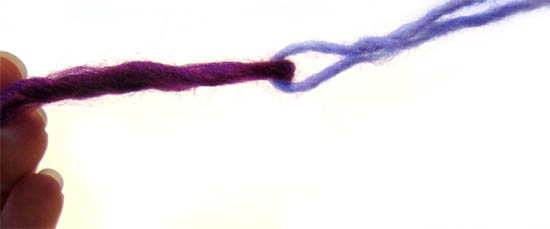
When you pull the ends, you’ll notice the two yarns are fully joined! Hooray!
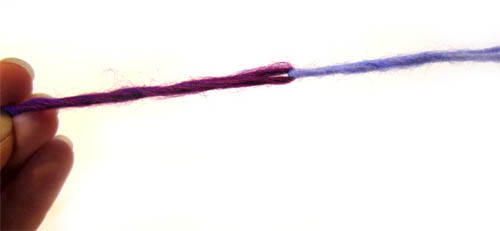
To make a magic ball, keep attaching yarns, one after another. You’ll probably find it helpful to wind the ball up as you go, particularly if you’re using long leftover lengths of yarn.
Once you’ve run out of leftovers (or have a ball that’s big enough), you can use your magic ball for any project! When knitted or crocheted, it’ll create an awesome striping-effect! And, you don’t need to do anything special at the joins, just keep working!
Isn’t that fun?
And doesn’t it make you want to gather up (and use) your leftovers?

Here are handy links to all the posts about yarn. . .
- How to Join Yarn with No Knot
- 3 Ways to Join Yarn without Tying a Knot
- What to Do If There’s a Knot in Your Yarn
- How to Work with Eyelash Yarn
- How Much Yarn Do I Need?
- How to Calculate Yarn Weight from Length
- How to Make a Magic Ball
- How to Use a Ball Winder
- Using a Nostepinne Replacement to Make a Center-Pull Yarn Ball
- How to Make Yarn from Fabric Strips
- Dye Yarn with Wilton Icing Dye
Return to the main table of contents for Let’s Learn to Crochet Amigurumi.
Move on to the lessons for the basic crochet stitches.
Happy stitching!

Thank you so much for this tutorial! I have a big bucket of scraps that I’ve been collecting for years and couldn’t bring myself to throw out. Now I can’t wait to get started making magic balls. I look forward to reading your posts every day. Keep up the great work!!
Stephanie
I’ve heard of the Russian Join but for some reason, I always thought it was another term for spit splicing. I can never seem to make spit splicing to work for me (even with 100% wool yarn) but this seems so much easier!
This is fantastic, I’ve wanted to know something like this for ages. Thank you.
Oh wow! That is like magic! Can’t wait to try this on all my leftovers – thank you so much for sharing this 🙂 Helen
Thanks so much – I was really looking forward to this post!
Thanks for another great blog. I have a question ….is there a length of yarn I should be going for on each color? I have some larger scraps that I think I will need to cut to achieve the striping I want, but am unsure how long to cut it? 3, 5, 10 yards? And is there a min/max number of colors per ball? Thanks again.
The length will depend on how many color changes you want. For example, if you’re making an animal that needs 100 yds of yarn, and you want 10 color changes, than each one shouldn’t be longer than 10 yards.
The bigger the animal, the longer each piece can be 🙂
I think the more colors, the better! But, the more colors, the more time-consuming the ball-making is… so it’s up to you 🙂
Thanks Stacey, as usual you make the process easy to understand & very logical. 🙂 And I over-think the whole thing 😉
I’m off to create! Have a wonderful day.
Hi thanks for showing us this! I do something like this but don’t do the loopy part. I ” sew” thread “a” into thread “b” then thread “b” into thread”a” . Make sense?? Let me know if u would like a “show” ? I think I could to it in pictures like u did. If it would help.
Thanks for that technique, Lori! Does it hold securely?
Great tutorial. Am going to start using this on the scrapy granny blanket I am working on. x
Thank you so much-awesome . Love learning new things; new knitter!!
Thank you so much! I was too late to purchase one of your Magic Balls. I hadn’t heard of the Russian Join so I started searching. 352 hits on Ravelry, but none explained WHAT it is…only troubleshooting when you use yarn that has been joined. This is VERY helpful. I can’t wait to get off work and start doing this with my stash! Then I’m going to make a crazy colored large owl. I only wish I’d known this when I made my huge crazy quilt. Hundreds of ends weaved in.
So happy to help! 🙂
Pingback: Episode 10 – How Knitting Exercises Your Brain - The Lost Geek
Thanks Stacey!!!
I’m crocheting a shawl, and when my fist skein ended, I remembered about this post, and It worked!!! Now I’m using my second skein and there isn’t any knot, squeeeee!!!
YAY!
Pingback: Needle Felt Yarn Ends for a Seamless Join | Knitting | CraftGossip.com
Have heard of the Russian join, but did not know how to do it. Will surely try this tonight when sitting in my recliner and playing with yarn. Thank you – thank you.
I can’t wait to try this, I noticed you yarn pile had different weights of yarn, so does it work that way?
I’ve used Russian join as i was practicing a group to master. It’s very easy, and does stay in a united join. As to some overthinking, you’d really be free from any swatching since there’d be no gauge to try to meet! Just think of the freedom to do something spirited. Thank you, and will sign up for your blog!