


The easiest way to make a smaller amigurumi is to use thinner yarn and a smaller hook. You can even use embroidery thread!
But if you want to use regular yarn, there’s still a way to do it!
You’ll need to do some figuring on your own, but altering existing patterns is the first step to designing your own… so give it a try!

As an example, I’m going to talk about how to make any size Mike the Microbe, from my book Crocheted Softies. Feel free to try it out with any pattern!
Identify the parts of the Pattern
Have a good look at your pattern, and try to identify big chunks of the pattern.
When you have a look at the small microbe’s pattern, you’ll notice that rounds 1-9 are increase rounds (rounds where you add stitches), followed by 7 plain rounds (where no increasing or decreasing occurs) and 8 decrease rounds (rounds where you decrease stitches).

Start crocheting… with fewer rounds!
Mike the Microbe is adorable as is… but how do you make him smaller? Crochet fewer of all kinds of rounds!
I crocheted one baby microbe by crocheting 5 increase rounds, 3 plain rounds and then 5 decrease rounds to finish.

After the end of 5 increase rounds, I had 30 stitches… so when it was time to decrease, I started at round in the decrease instructions that had 30 stitches. Who knew so many instructions were built into the pattern?
Make features smaller, too!
Follow a similar logic for making smaller features… working fewer increase and plain rounds. Above, I decided to omit the buggy eyes- they were too hard to make smaller!
I also made a microbe adding the eyes that were in the pattern without modification- notice that they’re proportionally bigger on the body… but I think that’s cute, too!

So tiny and so cute!
Try it on everything!

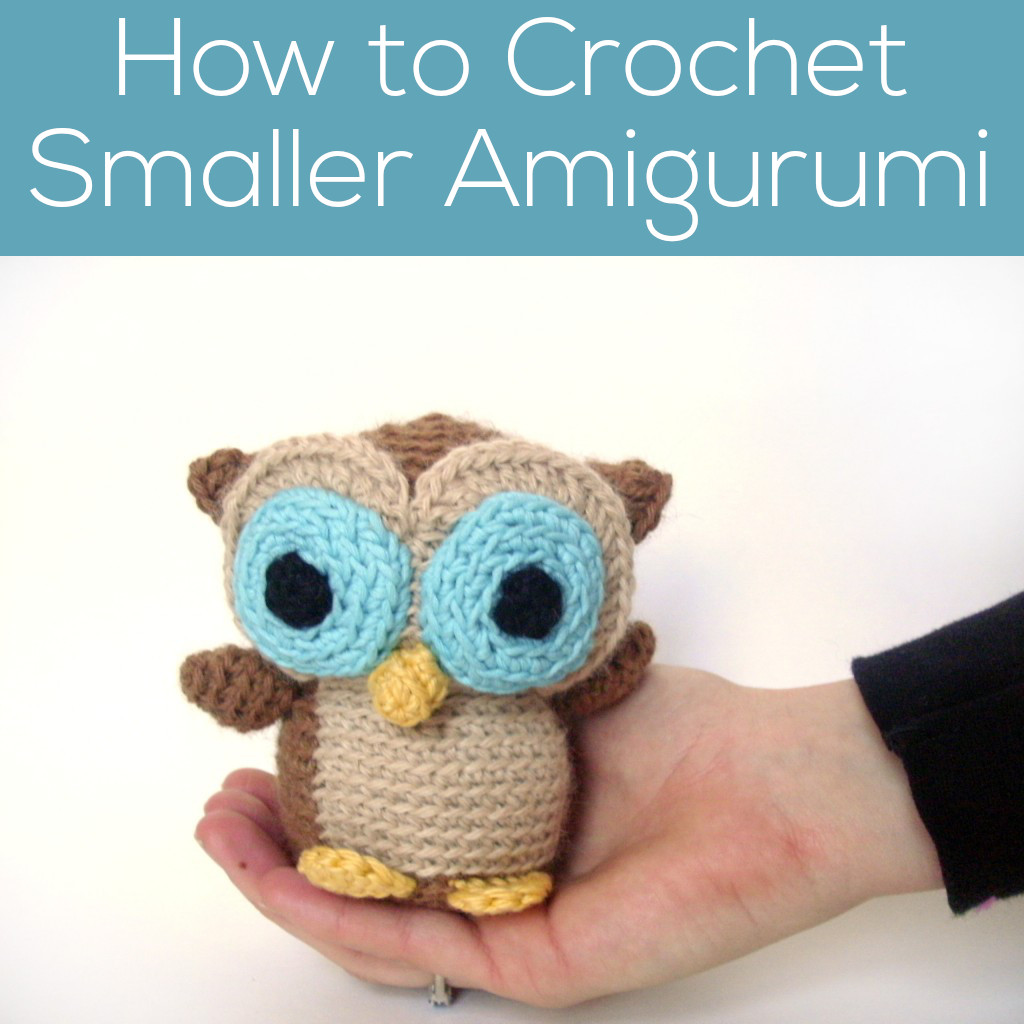
Once you’ve tried ‘shrinking’ a simple pattern like a microbe, it’s time to this trick with other amigurumi! I crocheted a tiny version of Nelson the Owl by crocheting 5 increase rounds and 5 plain rounds instead of the 10 called for in the pattern.
I worked fewer increase rounds on the wings and eye circles… and it’s important to keep in mind that it’s okay if the smaller version doesn’t look exactly like the bigger version. As long as it’s cute, you’re doing great!
Hope you give ‘shrinking’ some amigurumi patterns a try!

Here are handy links to all the posts about crocheting stuffed animals in different sizes. . .
- Four Easy Tips for Crocheting GIANT Amigurumi
- How to Crochet Smaller Amigurumi
- A Shortcut for Crocheting Stuffed Animals Faster
Return to the main table of contents for Let’s Learn to Crochet Amigurumi.
Move on to the lessons for crocheting more advanced shapes.
Happy stitching!

Those are just adorable! 🙂 I only know the basics of crochet, but I should definitely try this sometime.
Great tips, Stacey! Thanks for sharing. Your tiny Microbe turned out super cute!
Out of curiosity, have you ever enlarged a pattern? Other than using a bulky yarn and larger hook?
@Kim- I have! To crochet a larger amigurumi, you’ll want to work more increase rounds (sort of like the inverse of making it smaller). I think it’s worth it’s own blog post- look for it soon 🙂
Could you pretty please write a post about enlarging a pattern without using bulkier yarn and a larger hook?
Hi Anita-
Thanks for the suggestion! I’ll put it in my ideas-list 🙂
In the meantime, it’s the opposite of creating a smaller amigurumi… work more increase rounds to make it bigger!
Thank you so much for your generosity in sharing. Your website is fab!
If I decrease, how I Know were to do it
This blog post just suggests an outline… for the details about number of rows, etc, you’ll have to experiment a bit!
can you explain hoe to do this with rows that have these kids of instructins
sc, inc, sc, 3(sc, inc), sc, 2(sc, inc) (20)